The goals of this tutorial
In this Tutorial, we will create a load balanced domain.
Creating A Server Cluster
Click on the menu option "Server clusters" in the left hand menu in the OctaGate Switch™ Web Adminstration. That should take you to a page that looks something like this;
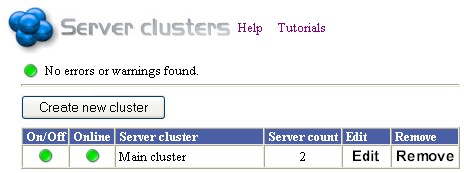
|
In the above example, I allready have a cluster called "MainCluster" which contains 4 actual servers.
Click the button "Create new cluster" to create the actual cluster.
That should take you to a page that looks like this;
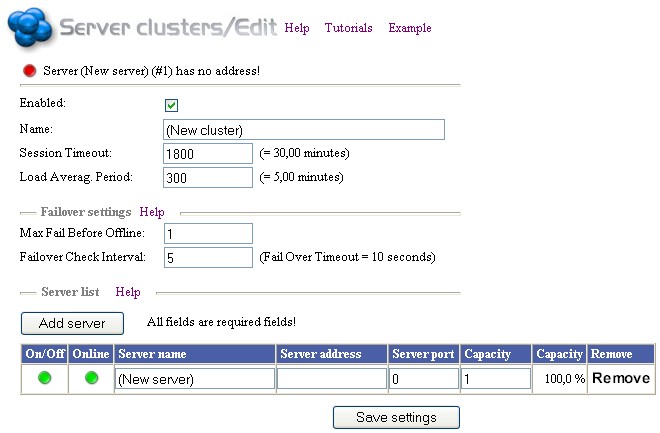
|
Create a name for the cluster - the name will be used to identify the cluster, so picking a name with care might save you headache later.
Leave ConnectionTimeout at 1800 - this means that user sessions can remain idle for 1800 seconds (30 minutes) before the connection is dropped and the user will be connected to another server.
Now fill out the settings for the server, you must set a Server address and a server port, all other fields can be left as they are. The server name is just for your identification. Again, picking a name with care might save you headache later.
Server Address can be either a host name or a IP number.
A proper load balancing cluster will need at least two servers, so click Add server again. Fill out the new server with the settings for your second server. I've added a third server for the list below;

|
With the settings above, the cluster has three servers to choose from. OctaGate Switch™ will try to make sure that Server1 receives 44,4% of all traffic, and Server2 and Server3 33,3% and 22,2% respectively. If "Online" is red, that means that OctaGate Switch™ couldn't find a server responding on the address/port combination that you specified.
That completes the cluster, now we'll use it in a domain.
A Load Balanced Domain
That completes the cluster, now we'll use it in a domain.
Create a domain as you did in the tutorial The First Domain.
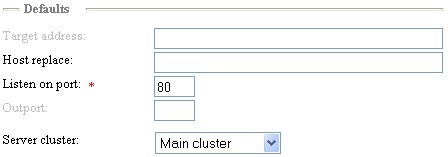
To make the domain use a server cluster, you must change the value of "Server Cluster" to the server cluster you just created. I called my Server Cluster "WebApp1 Cluster", as you can see below;
|
That's it, you should now have a domain that's load balanced and that handles failover!